How to document your sample
General procedure of handling soil samples
- Collecting soil samples
- Air-dry soil sample
- Collect samples for petri dish display and glass jar storage. Label the container.
- Prepare sample for sedimentation test
- Sedimentation test
- Photograph soil sample and sedimentation test result
- Dry sedimentation test sample
- Mix the sedimentation test sample with the glass jar sample
- Post-production for soil test photos
- Update TAL-L database
- Prepare and print material panel
- Mounting soil sample on panel
General procedure of handling other material samples
- Receive samples
- Photograph sample
- Update TAL-L database
Tutorial for soil sampling
Before going to site
The following materials and tools have to be prepared and checked for their functionality:
- Auger and/or hand shovel
- Measuring tape
- 3-5 zipper bags (min. 25x25cm) for each location
- Plastic sheet
- Site map
- Clipboard
- Pen
- Gloves
On site
- Record the geographic coordinate for your sampling location with GPS
- Take photos of the site condition
- Remove plant residue from the surface
- Extract soil with an auger by rotating and pushing down the auger slowly
- Sample to a depth of 150mm, 500mm, and 1000mm (if possible) and note down the lower layer depth. For example, for soil excavated from 250mm to 400mm deep, please write down 400mm.
- Fill the zipper bag with at least 2/3 of the soil collected
- Seal the zipper bag and label it with the required information (each layer of soil be in an individual bag)
- Location
- Geographical reference (coordinates at the excavation point)
- Date and time of sampling
- Depth of sampling
- Degree of slope
- Perform an on-site surface water repellency test
- After sampling, clean the sampling tools to prevent cross-contamination between samples
Prepare soil samples for archiving and testing
- Air-dry your sample on plastic trays. Put a skewer all the way into the soil, leave it for several minutes and then pull it out. If it’s cool to the touch or wet, the soil is still wet.
- After the sample is thoroughly dried, collect samples for petri dish display and glass container storage. Label the container. Label for glass container: https://drive.google.com/file/d/13rdXFN4bZtDz9xJtibGyxA_VBD6RnH9j/view?usp=sharing
- Take photos of your soil samples and the (sedimentation) test result
Basic soil testing
On-site surface water repellency test
The presence of water-repellent surface soil can be identified by gently placing a drop of water on the dry soil surface with a squeeze bottle. If the soil is repellent, the droplet will form a bead and sit on the soil surface or only penetrate the soil slowly.
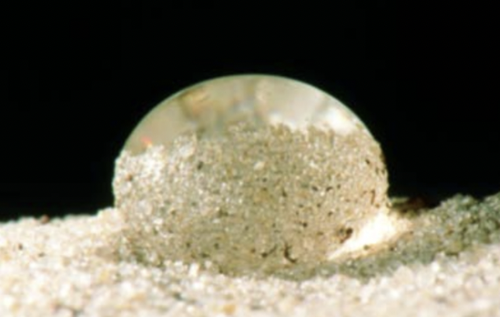
Reference image of repellent soil sample
(image credit: Department of primary industries and regional development western australia. (2018, May 1). Soil water repellence - diagnosing the problem. Agriculture and Food.)
Sedimentation test
Preparation
- Remove organic matters (e.g. fibrous root) by hand
- If your soil has clumps or clods, break them up
- Use a soil sieve (2mm sieve) to filter out the coarse fragments, the remaining are fine earth. Put coarse in a separate jar.
Performing the test
- Use a straight-sided glass jar (quart size or somewhat larger) with a tight-fitting lid.
- Fill the jar about 1/3 full with dry soil.
- Fill the jar with water, up to about 10mm below the rim.
- Cap the jar and shake it for 5 minutes. Leave the jar on a level surface.
- After 1-2 minutes this is the SAND layer.
- After 1 hour this is the SILT layer.
- After 24 hours (or until the water is relatively clear, which may take several days) this is your CLAY layer. Anything left floating is just organic material.
- After 24 hours, measure the depth of the settled soil and coarse fragments and add them up. It is known as the total depth.
- Use a ruler to measure the depth of each layer, then calculate the percentages of coarse, sand, silt, and clay.
Documentation
- Record the percentages in the database
- Dry your sedimentation test sample on a plastic tray, crash it afterward and mix it with the coarse fragment and the glass jar sample.
pH Test
- Take a small handful of soil and wet it thoroughly with distilled water. You could also use a plastic lid to mix the soil with distilled water.
- Touch the test strip to the water and soil mixture and wait for the color to change.
- Compare the color to the color chart that comes with strips. Take the reading from the area that is closer to the soil rather than further away from where the water wicks up to.
Strongly acid: <5.5
Acid: 5.5-6.5
Neutral: 6.5-8.0
Alkaline: >8.0
Tutorial for photographic records
Camera setting
- Use of lenses: Focal length 50mm/ 58mm/ 24-70mm
- Use Manual mode for taking photos
- White balance: 3200k
- Aperture: F8-13 (To capture all the material details)
- Shutter speed: Not slower than 1/120 (To reduce camera shake blurring)
- ISO: to control the exposure
- Once the camera setting is set, only adjust ISO to control the exposure
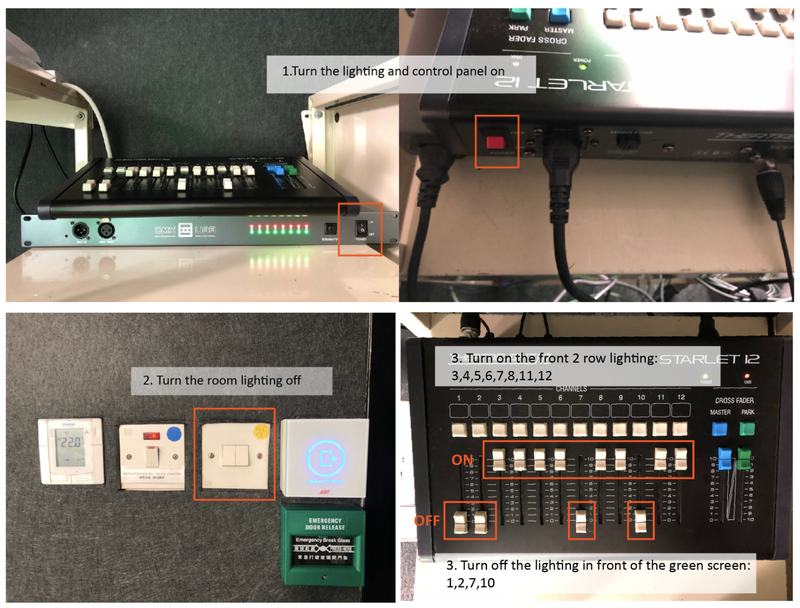
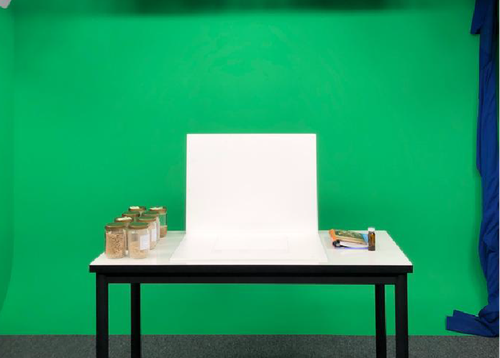
Studio setup for Room KB823
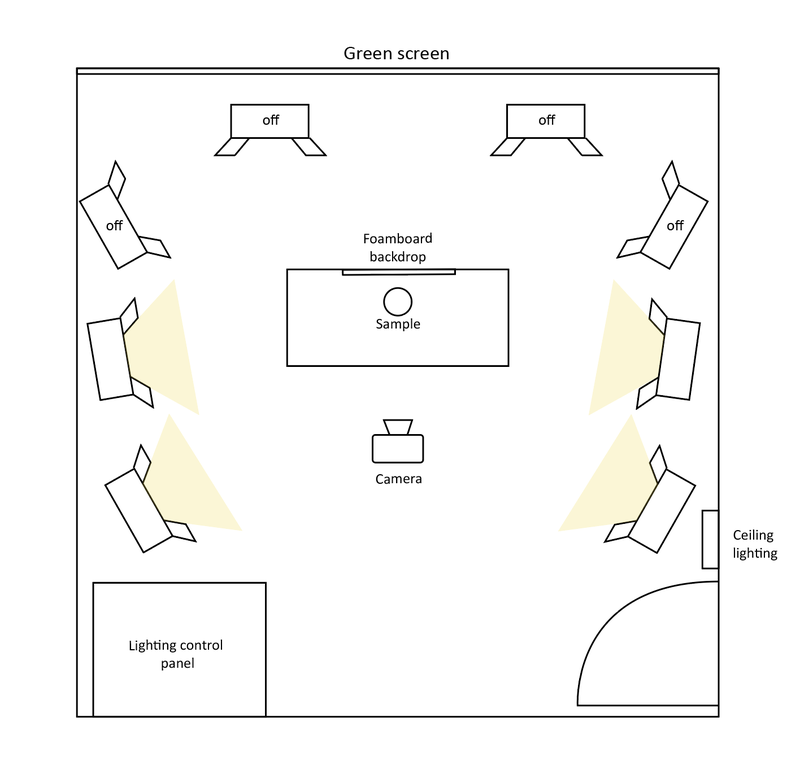
Move the table in front of the green screen and set up a white foam board backdrop
Soil sample
Sedimentation test (or other samples in glass jar)
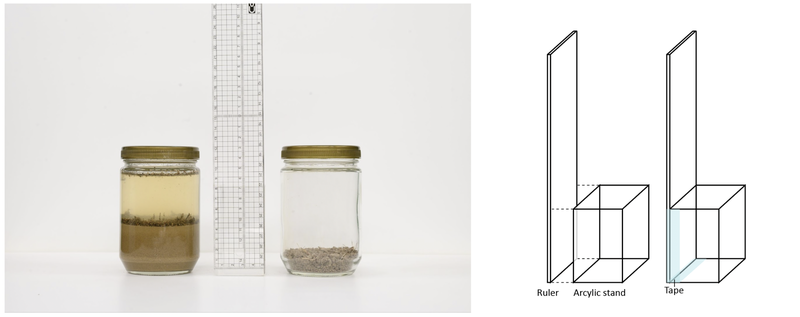
Tools needed:
- Transparent ruler + Acrylic stand
- Empty jar
Setup:
- Pour the coarse fragment into an empty jar
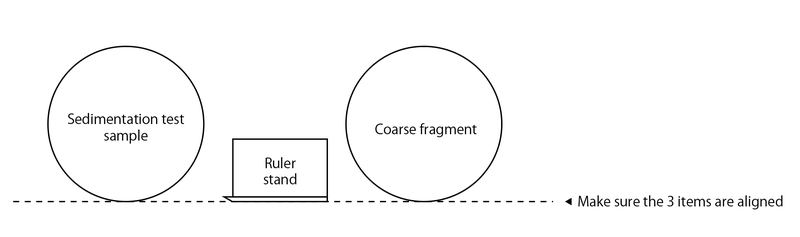
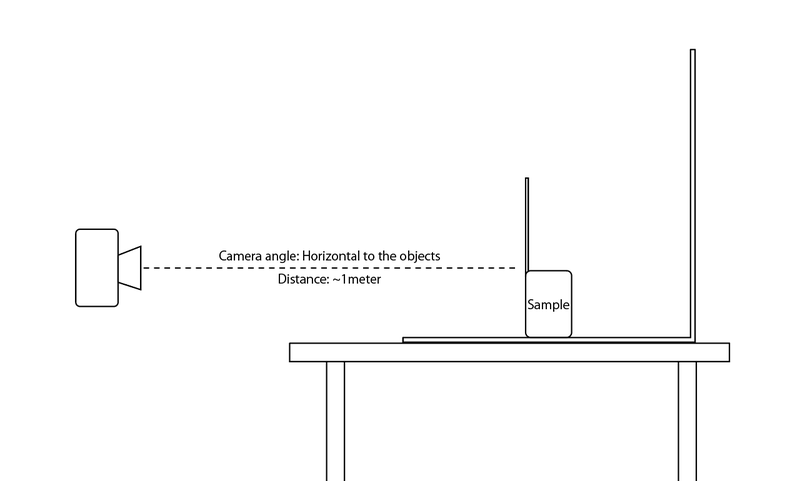
- Place the ruler set, sedimentation test sample, and the bottle of coarse fragment
According to the following setting:
Loose soil sample (or other granular material)
Tools needed:
- Acrylic plate
- Permanent marker
- Information card
- Alcohol & napkin
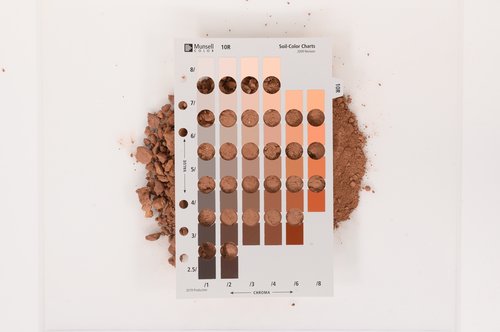
- Munsell color book
- Wet towel
- Paper funnel
- ruler
Setting:
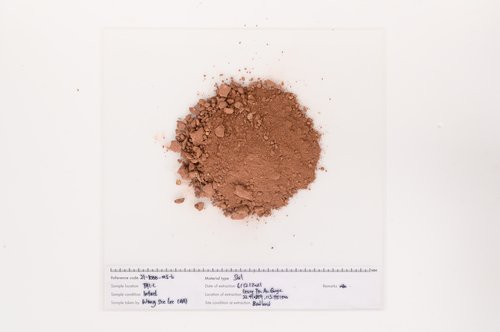
- Place the information card under the acrylic plate, fill in required info with permanent marker
https://drive.google.com/file/d/1scbwf8RA8SjuMl4dfHlmvzKxx7PD6q-R/view?usp=sharing
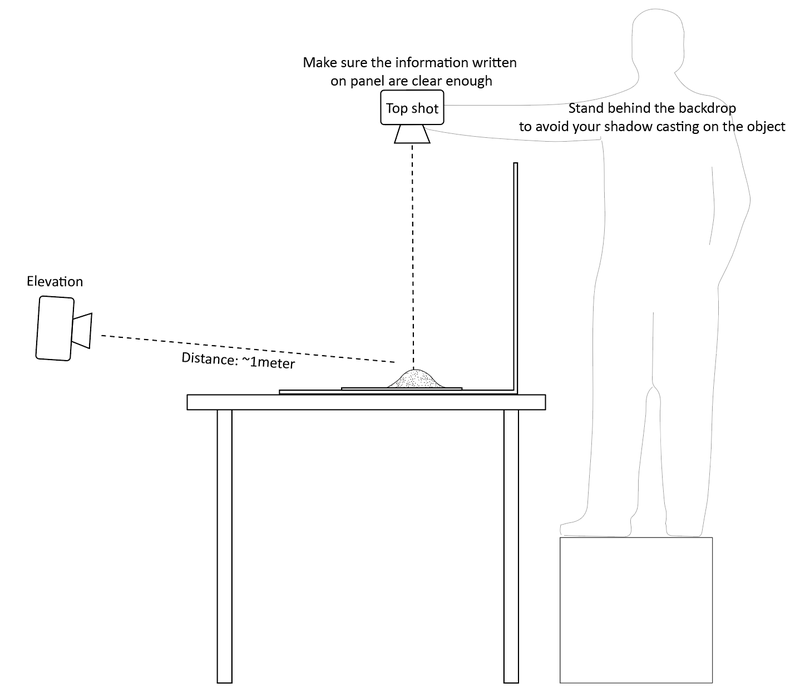
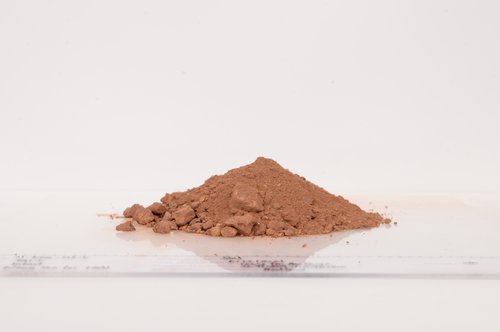
- Pour your sample at the center of the acrylic plate slowly with a paper funnel until it forms a dune
- Take photos for elevation and top shots. Make sure you stand behind the foamboard backdrop to avoid your shadow casting on the object
- After shooting for elevation and top shot, use a ruler to flatten the dune. Place the matching color card on top of the soil and photograph the result
- Wipe away the information with alcohol after shooting
- Pour the soil sample back into the jar and clean the acrylic plate with a wet towel
- Please double check all images are clear enough to show all the details and information
Photograph other samples
- The angle of shoot are similar to the soil sample, make sure you have an elevation and top shot for your sample.
- Close-up shots for material detail e.g. joints, texture, layers
