How to add a new material
- Log on to the CMS through the site login page or directly from the cms login page.
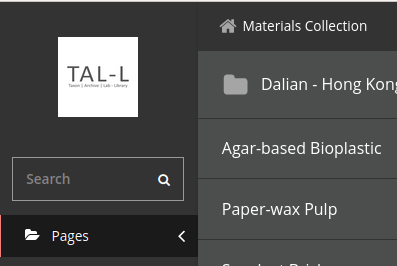
2. Go to your sidebar and click "Pages". If you sign in with a student account, your user interface should show a list of materials under the "Materials Collection" header. Click this header.
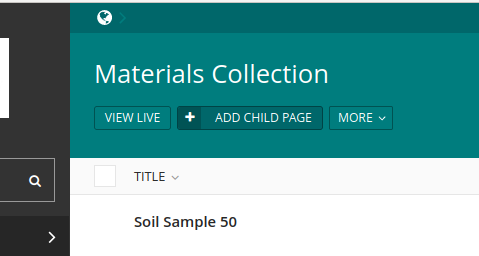
3. You will be redirected to the Material Collection page, which lists the most recent samples from other contributors. If this entry is for your first material iteration, click the "+ Add Child Page" button under the "Materials Collection" header.
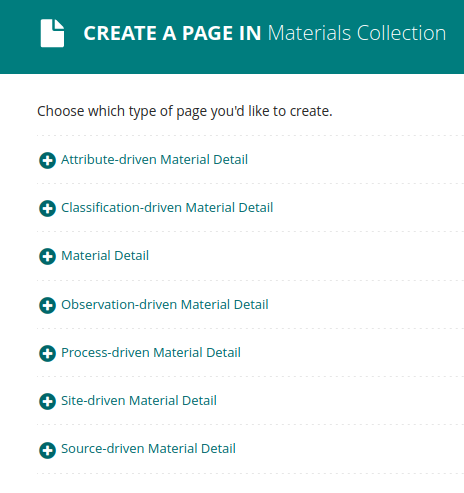
4. Under the "Create a Page in Materials Collection" header, click the link that matches your material track. For instance, if your material is attribute-driven, click the "Attribute-driven Material Detail" link. Only select the generic option "Material Detail" when you are working on materials with preassigned legacy sample IDs.
5. Proceed to the next section when redirected to an empty form.
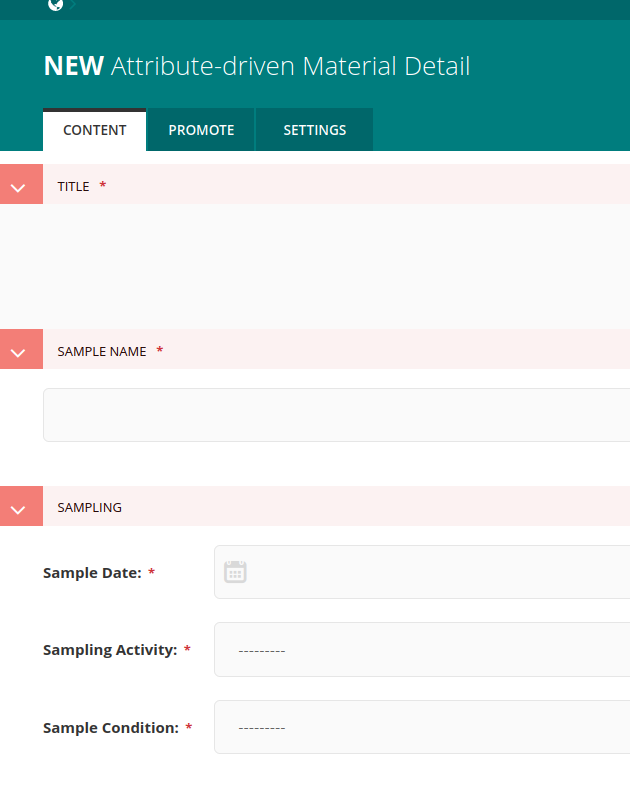
Note: Instructions in remaining sections target attribute-driven materials. But the flow is similar for materials in other material tracks.
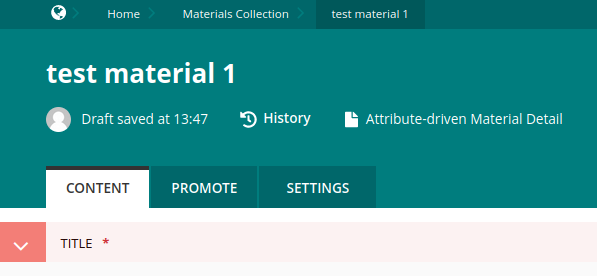
- Under the "Content" tab of your material detail form, click on the whitespace below the "Title" header and enter a short title. This entry will appear on your browser header.
- Click on then field under the "Sample Name" header. Enter a sample name no longer than 50 characters.
- Under the "Sampling" section, enter your "Sample Date" from the date picker. Select the relevant "Sampling Activity" and "Sample Condition" from the dropdown. If you prefer to bypass the date picker, enter your sample date in ISO format i.e. 'YYYY-MM-DD'.
- Consult the material wheel to see if your material matches a predefined type. Alternatively you can check the list by clicking on the "+ Add Type" button. When the category chooser panel appears, click "Choose Material Category".
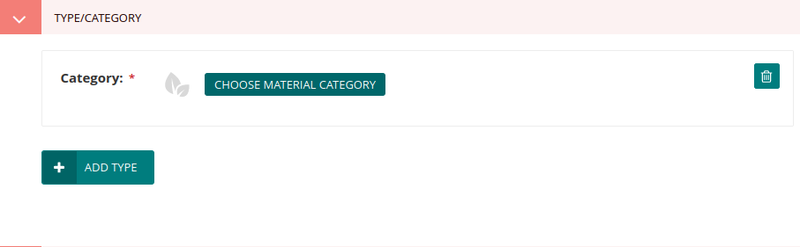
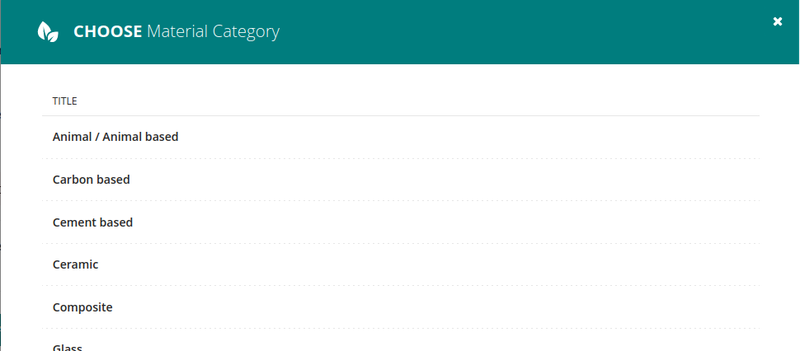
5.When a modal appears, choose a material category from the list.
Make sure no unfilled category chooser panel is present on your form. Click the delete button (the garbage can icon) to remove empty choosers. Otherwise a notification will appear upon submission complaining that the entry is missing. For instance, if you cannot classify your material into one of the default categories, it is a null entry. Remove all unfilled category chooser panels.
6. Repeat 4-5 if your material fits more than one category. You can add a maximum of two categories.
7. Enter a concise summary. The basic richtext editor has everything you need to format your text. Your moderator will love you to bits if everything is grammar- and spell-checked before submission.
If you have images to add:
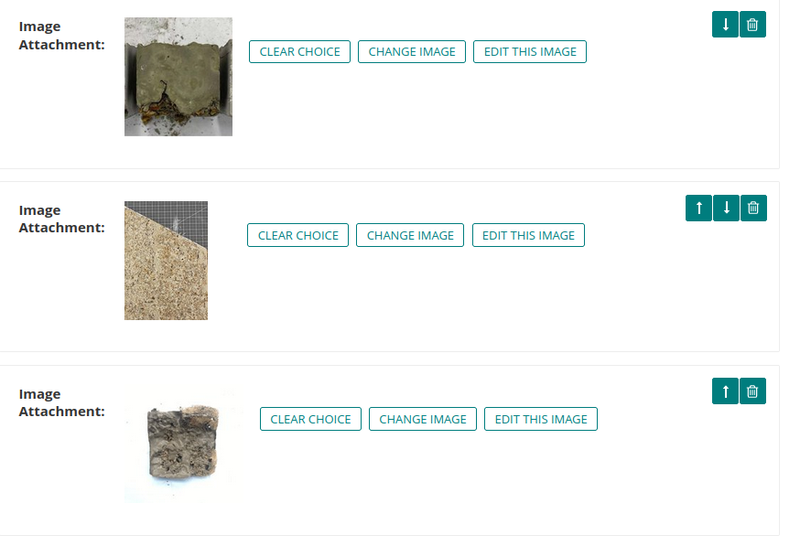
- Click the "+Add image" button. When the image attachment field pops up, click choose an image.

2. A modal will pop up. If your image is already uploaded to the CMS, under the "Search" tab, search and attach your image. Then jump to step 6. Otherwise, click the "Upload" tab.
3.(Optional) Give your image an appropriate title. The system will default to the filename of the image if no title is entered.
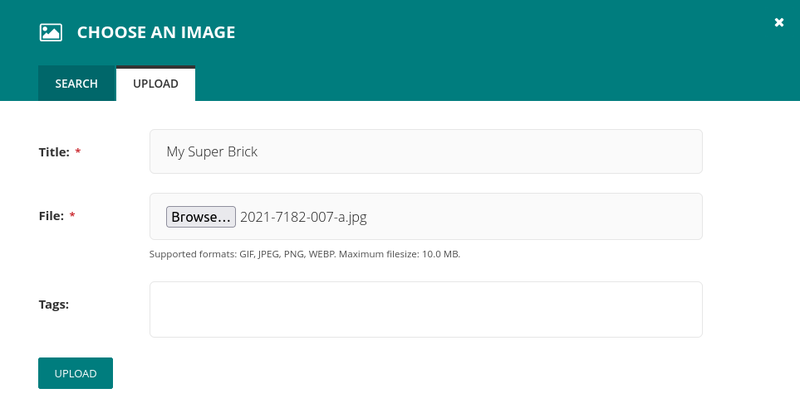
4. Hit browse and select the image from your file manager. Note: The exact look and feel of the file manager depends on your operating system. Supported file sizes are GIF, JPEG, PNG, and WEBP (bitmaps). Resize your image if it is larger than 10 mb and make sure it is saved as RGB colour mode.
5. Click the upload button.
6. Once the image is successfully added to the list, you can delete the attachment or update the image.
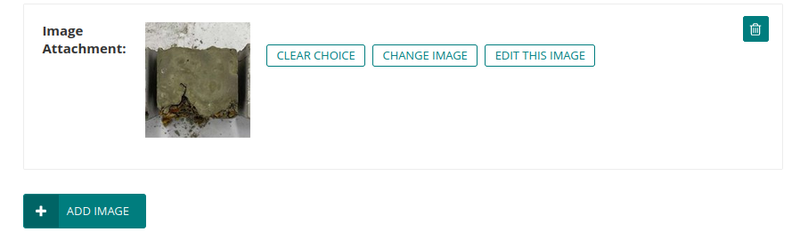
7. Repeat 1-6 if you have more than one image.
8. If more than one image is attached, order them using the up and down arrow buttons. The first image in the set will also be shown on the Materials Collection index page.
If you are attaching documents
The steps for attaching documents are similar to those for images, except that no document preview is available.
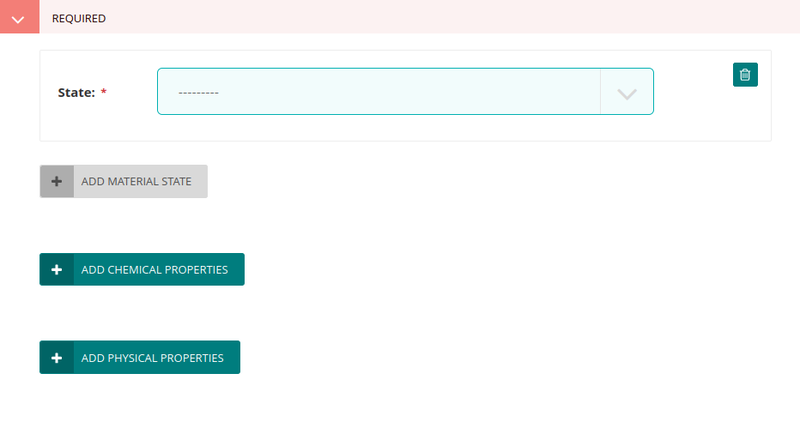
Note: Fields, inline panels and subforms appearing under the "Required" section vary by the chosen material track.
- Select an appropriate material "state" from the dropdown.
- If chemical properties are available, click the "+ Add Chemical Properties" button. Otherwise go to step 4.
- A subform will appear on the screen. Remove the subform if all entries are null.
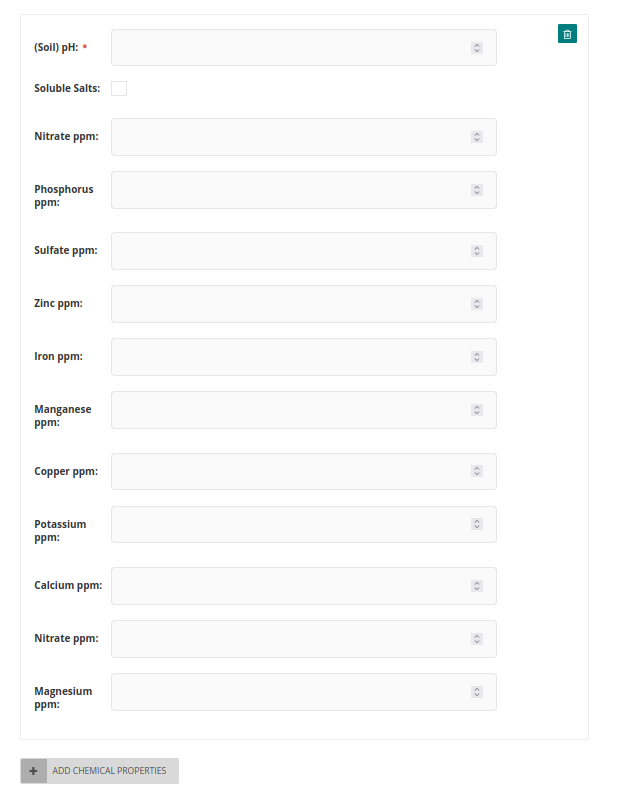
4. Enter the "pH" value to two decimal places, i.e. 12.23. Checks were in place to make sure the input is between 0 and 14.
5. Check the "soluble salts" checkbox accordingly.
6. If high-performance liquid chromatography (HPLC) or liquid chromatography-mass spectrometry (LC-MS) analysis was conducted on your sample, enter the ppm range for each matching (in)organic element and compound. Entries must be integers i.e. a number without decimal places, ranging between 0 and 10,000. Otherwise leave those ppm fields empty.
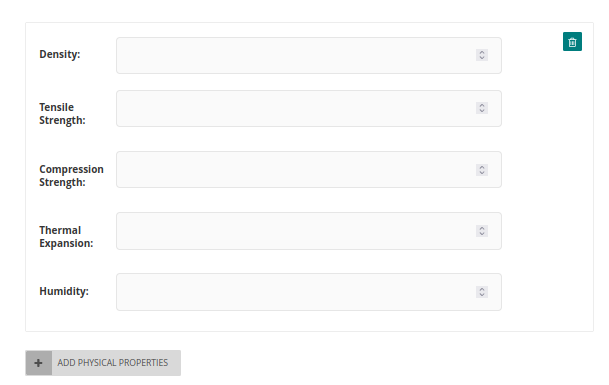
7. If physical properties are available, click the "+ Add Physical Properties" button. Remove the subform if all entries are null.
The rest of the form is optional. A subform will pop up only when you hit the corresponding "+Add Attribute" button. Check the wheel and see if any of them are also applicable to your material. Below is a quick overview of these entries:
Extraction Site
Only fill out this part of the form if the extraction location is known.
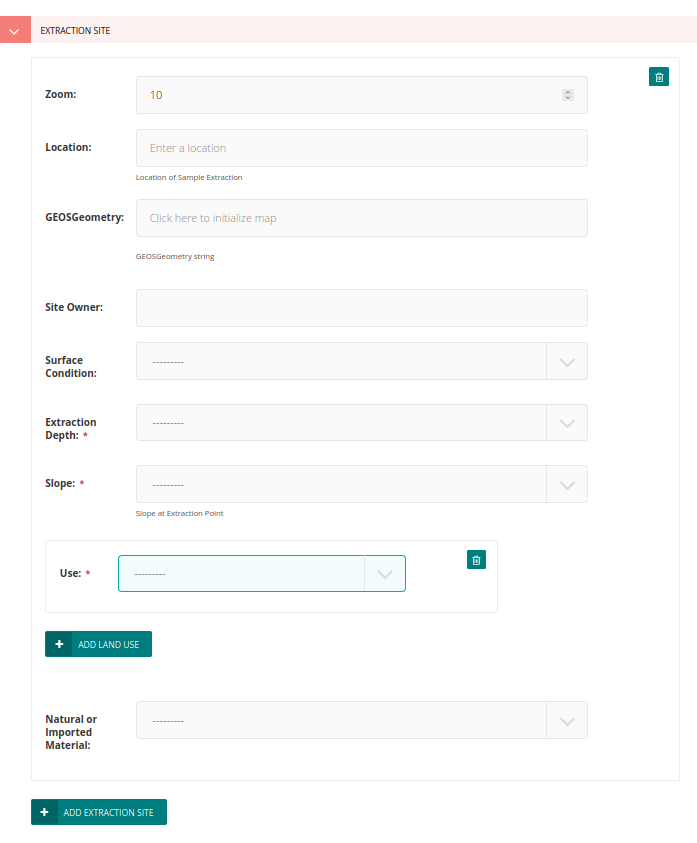
- Enable the subform if the extraction location is known.
- Click on the "Location" field to enable the Google Geocoding function. Any address input will be converted to lat-long coordinates in the "GEOSGeometry" field.
- If you prefer to work the other way around, click on the "GEOSGeometry" field to enable the Google Map. Drag your map pointer to match your extraction location.
- Fill in all required entries (anything with red asterisks * beside them). Also fill in non-required entries if data is available.
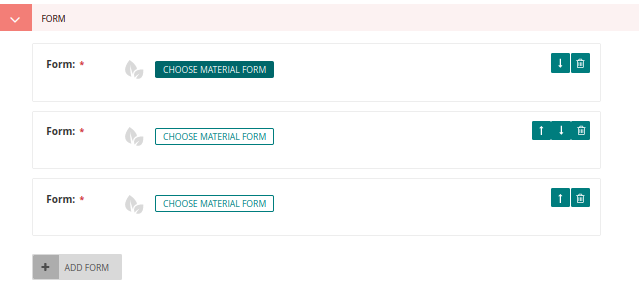
Form
The form of the material. Up to three entries can be added. Click the "Choose Material Form" button to explore the list of available options. Ordering is supported.
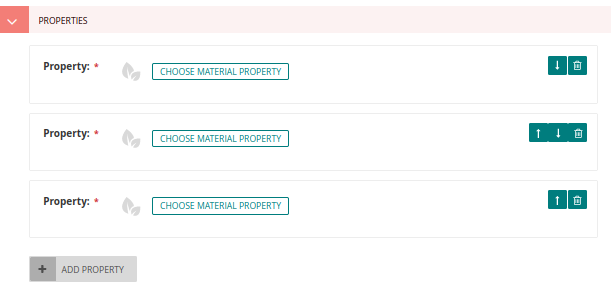
Properties
Up to three properties can be added. Click the "Choose Material Properties" button to explore the list of available options. Ordering is supported.
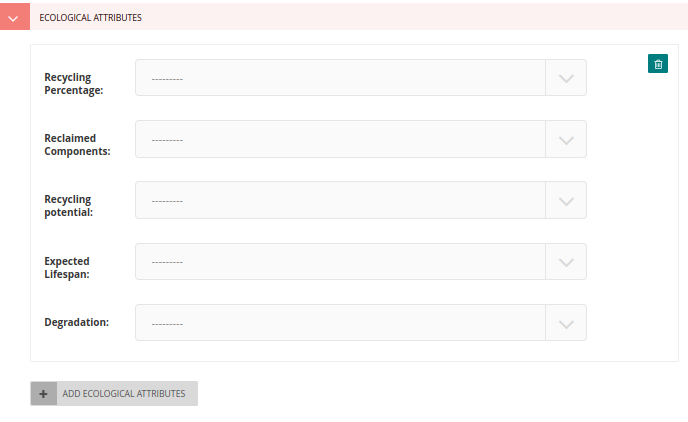
Ecological Attributes
Select from one of the drop-downs if the percentage range is known, or leave it blank '-------' if no data is available.
Production Attributes
Select from one of the drop-downs if the percentage range is known, or leave it blank '-------' if no data is available.

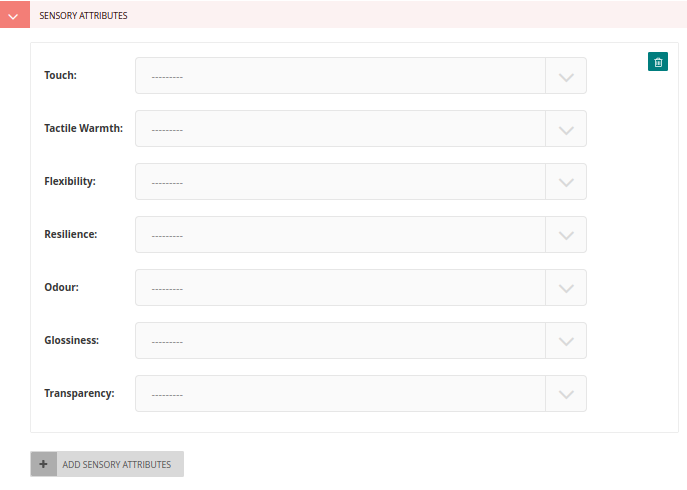
Sensory Attributes
Select from one of the drop-downs if the percentage range is known, or leave it blank '-------' if no data is available.
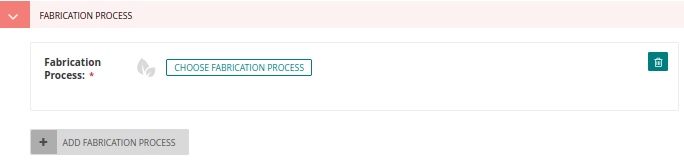
Fabrication Process
At most one process can be added. Click the "Choose Fabrication Process" button to explore the list of available options.
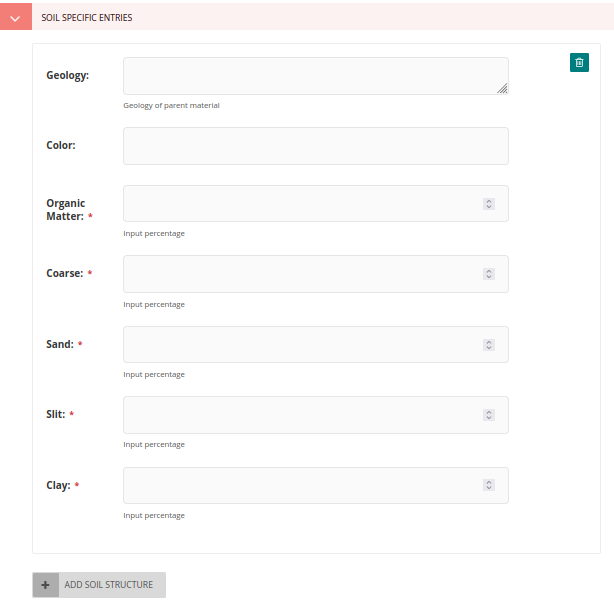
Soil Specifics
Enable this subform if your material contains soils.
"Geology" field: Free Text description
"Color": Must be a valid Munsell Color Code i.e. 10YR 6/4. This field is validated before submission.
Six soil structure fields: enter a percentage range from 0 to 100. Up to 1 decimal place is supported, i.e. 99.8
Previously a database constraint was added requiring soil structure fields to sum to 100. But this feature is removed since server patch 0.2.7 was applied in January 2022.
- Find the popup at the bottom of your screen.

2. Always hit the "Save Draft" button to save your documentation progress. Do this frequently.
3. Hit the "Preview" button to preview your listing. A preview page will appear on a new tab.
4. When you are ready to submit, click the side button (^) and select "submit for moderation". Do not click the submission link if you have multiple iterations to add.

If you have more than one iteration to submit, you will have to submit multiple pages.
You can always start with a new entry. But as most of the data is going to be shared between them, a less tedious way is to clone a base material page that already exists and modify it accordingly.
A) If your base material page is already live (approved by the moderator and published)
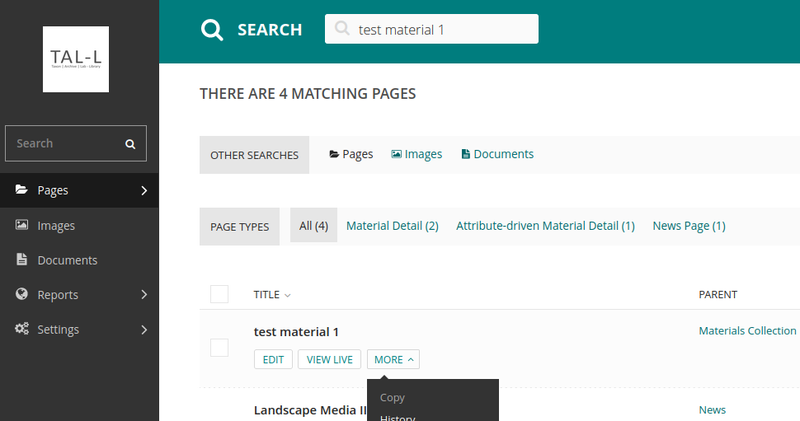
- Use the search field on your sidebar to search your base material page.
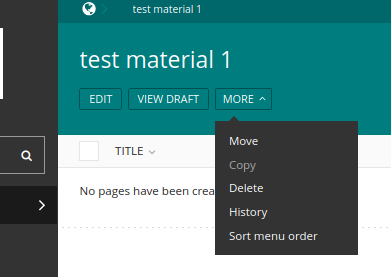
- Hover over your material in the list. Click the "More" button, then select "Copy".
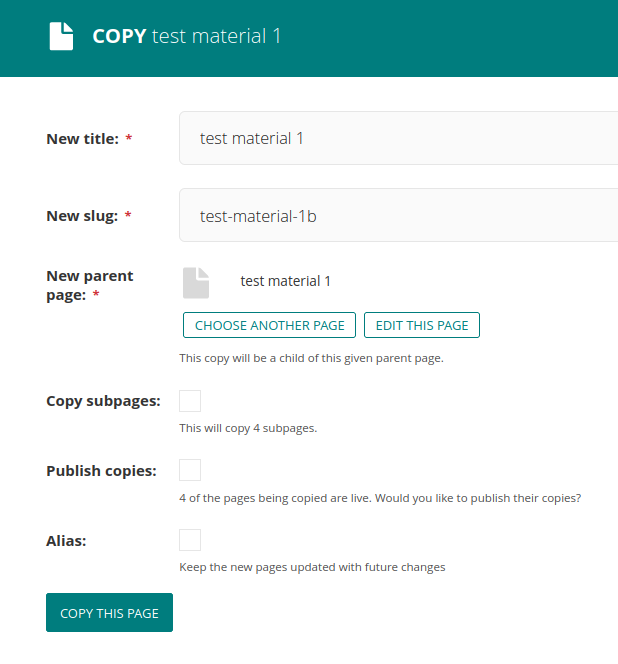
3. Give your copy a new title if necessary and a new slug. The title can be the same as the base material, but the slug must be a unique database entry. One simple way to set a unique slug is to append a character to the default slug.
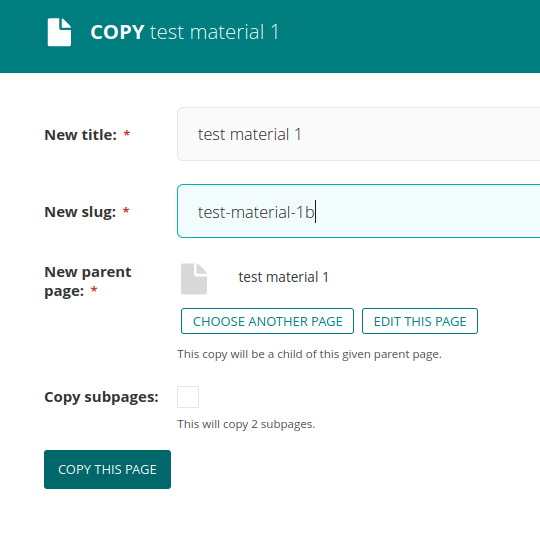
4. Set your base material page, the one documenting your first material iteration, as the New parent page.
5. Uncheck all checkboxes.
6. Hit "Copy this page".
7. Find the cloned page and edit the fields as necessary.
8. Submit for moderation when you are done with editing.
B) If no base material page is added yet
- Follow the instructions outlined in parts I to VI of this tutorial to add an entry for the base material, ex. your first iteration. Make sure you have hit the "Save Draft" button before proceeding.
- Go to the header area. Find the breadcrumb (the stuff beside the "World" icon) and click the base page title.
3. You will be redirected to a list view. Click the "More" button in the header area, and select "Copy".
4. Give your copy a new title if necessary and a new slug. The title can be the same as the base material, but the slug must be a unique database entry. One simple way to set a unique slug is to append a character to the default slug.
5. Set your base material page, the one documenting your first material iteration, as the New parent page.
6. Uncheck all checkboxes (if available).
7. Hit "Copy this page".
Note: In case permission to set the base material page as the "New parent page" is denied, revert back to the "Materials Collection" Page (the default setting). Your instructor or moderator will fix the page hierarchies for you as they review your submission.
8. Find the cloned page and edit the fields as necessary.
9. Submit for moderation when you are done with editing.
C) If your base material page is undergoing moderation
Try proceed without cancelling your moderation and follow the steps in subsection VII.B.
If you do not have editing rights to the page under moderation, your options are limited. Either cancel your moderation submission and follow steps under subsection VII.B again, or simply submit a new submission.
D) If you have multiple base material pages that are related and you want to tidy up
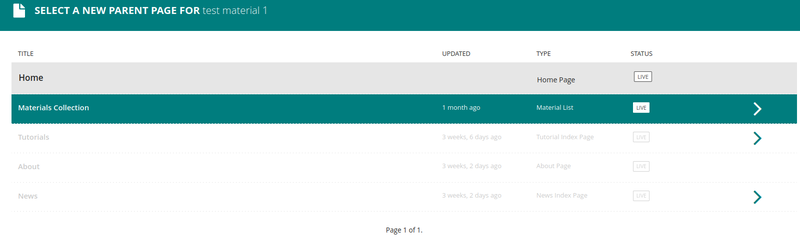
- Find the page you want to move. Hover on top of it and click the "More" button. Then select "Move".

2. Select a new parent page from the list. Note that you can only select pages not greyed out as the new parent page.

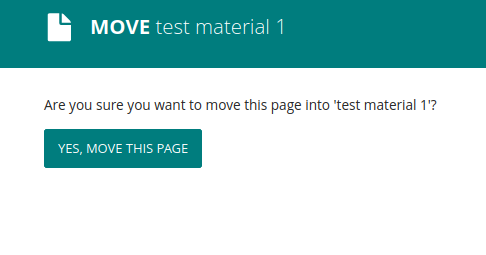
3. Click "Yes move this page" to confirm the move
Now wait for follow up comments from your instructor or moderator.